Recently I have decided to make small project to measure my apartment temperature. so I started looking for a module to achieve this.
I found that DHT11, which is the most common and efficient module, it’s very cheap and it does its job.
In this article I will try to explain how easy, it is to setup this module with raspberry pi, also how you can run it and get the temperature and humidity of your home.
I have tried to make this post very simple, it is more for people who just purchased their module and they don’t know what to do next.
What I’m trying to accomplish
- Setup the sensor (DHT11) with the raspberry pi.
- Run a python script that measure the temperature and display the results.
Prerequisite
- Raspberry PI
- Jumper cables
- DHT11 sensor
Setup DHT11 (Sensor)
DHT11 is very small module that provides digital reading of humidity and temperature, it comes with three pin or four pins depending on which version you bought.
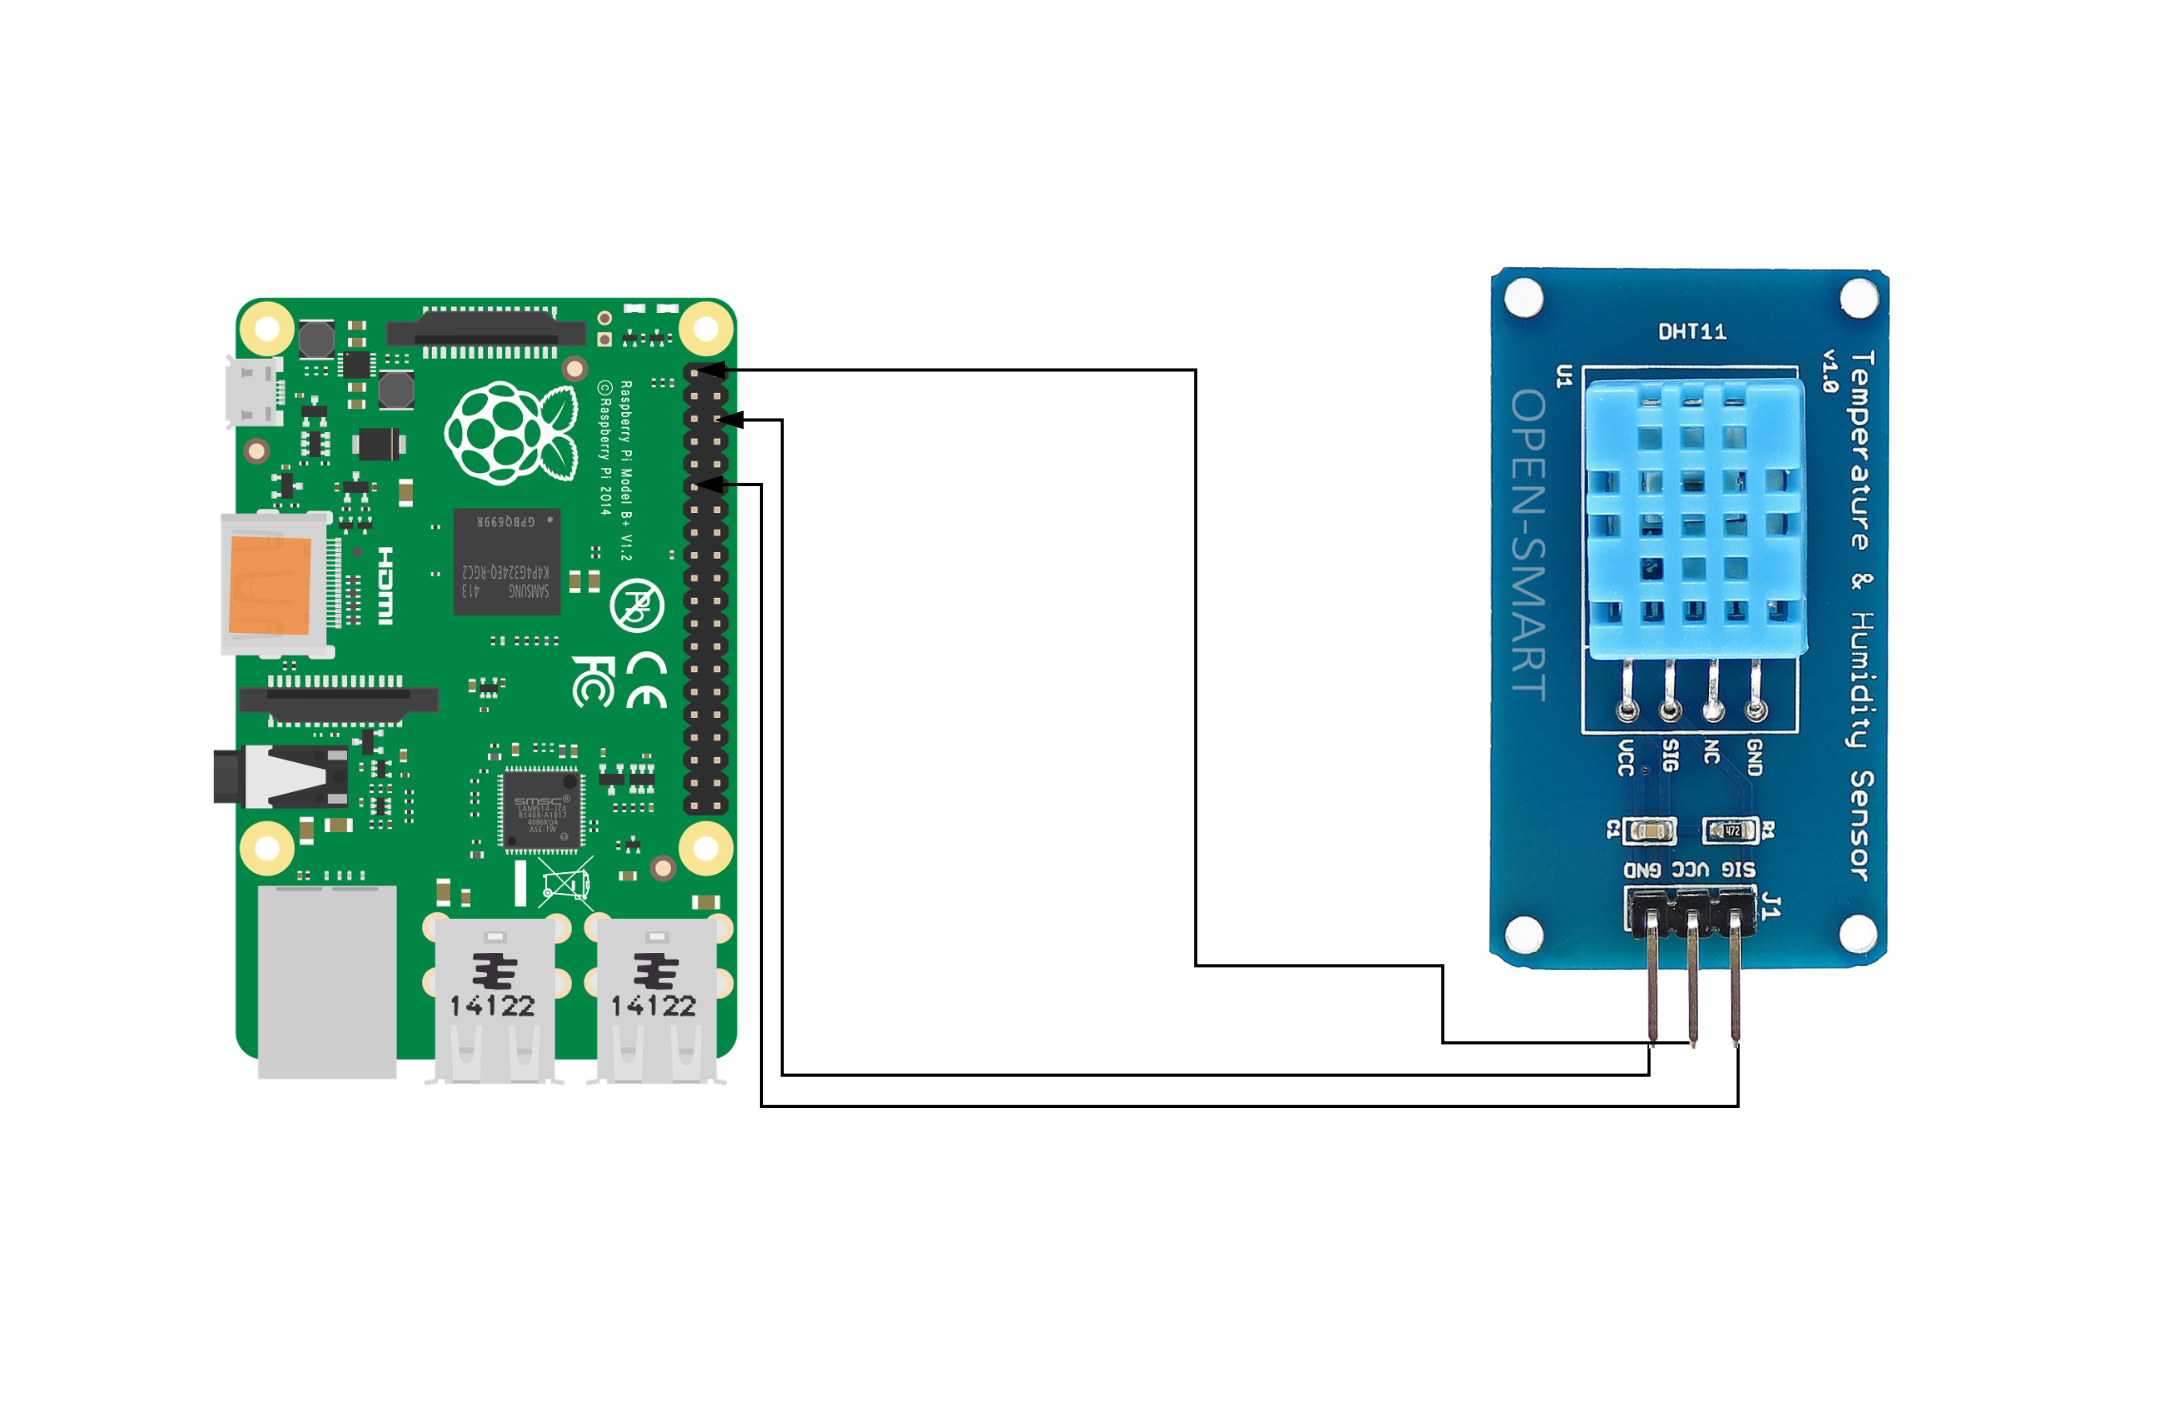
I have the 3 pin version. which are: VCC, GND and DATA. first you need to put the jumper wires into the sensor, then map the pins to the respective pin on raspberry pi. see below the mapping
- VCC -> Pin 1
- GND -> Pin 6
- DATA -> Pin 11
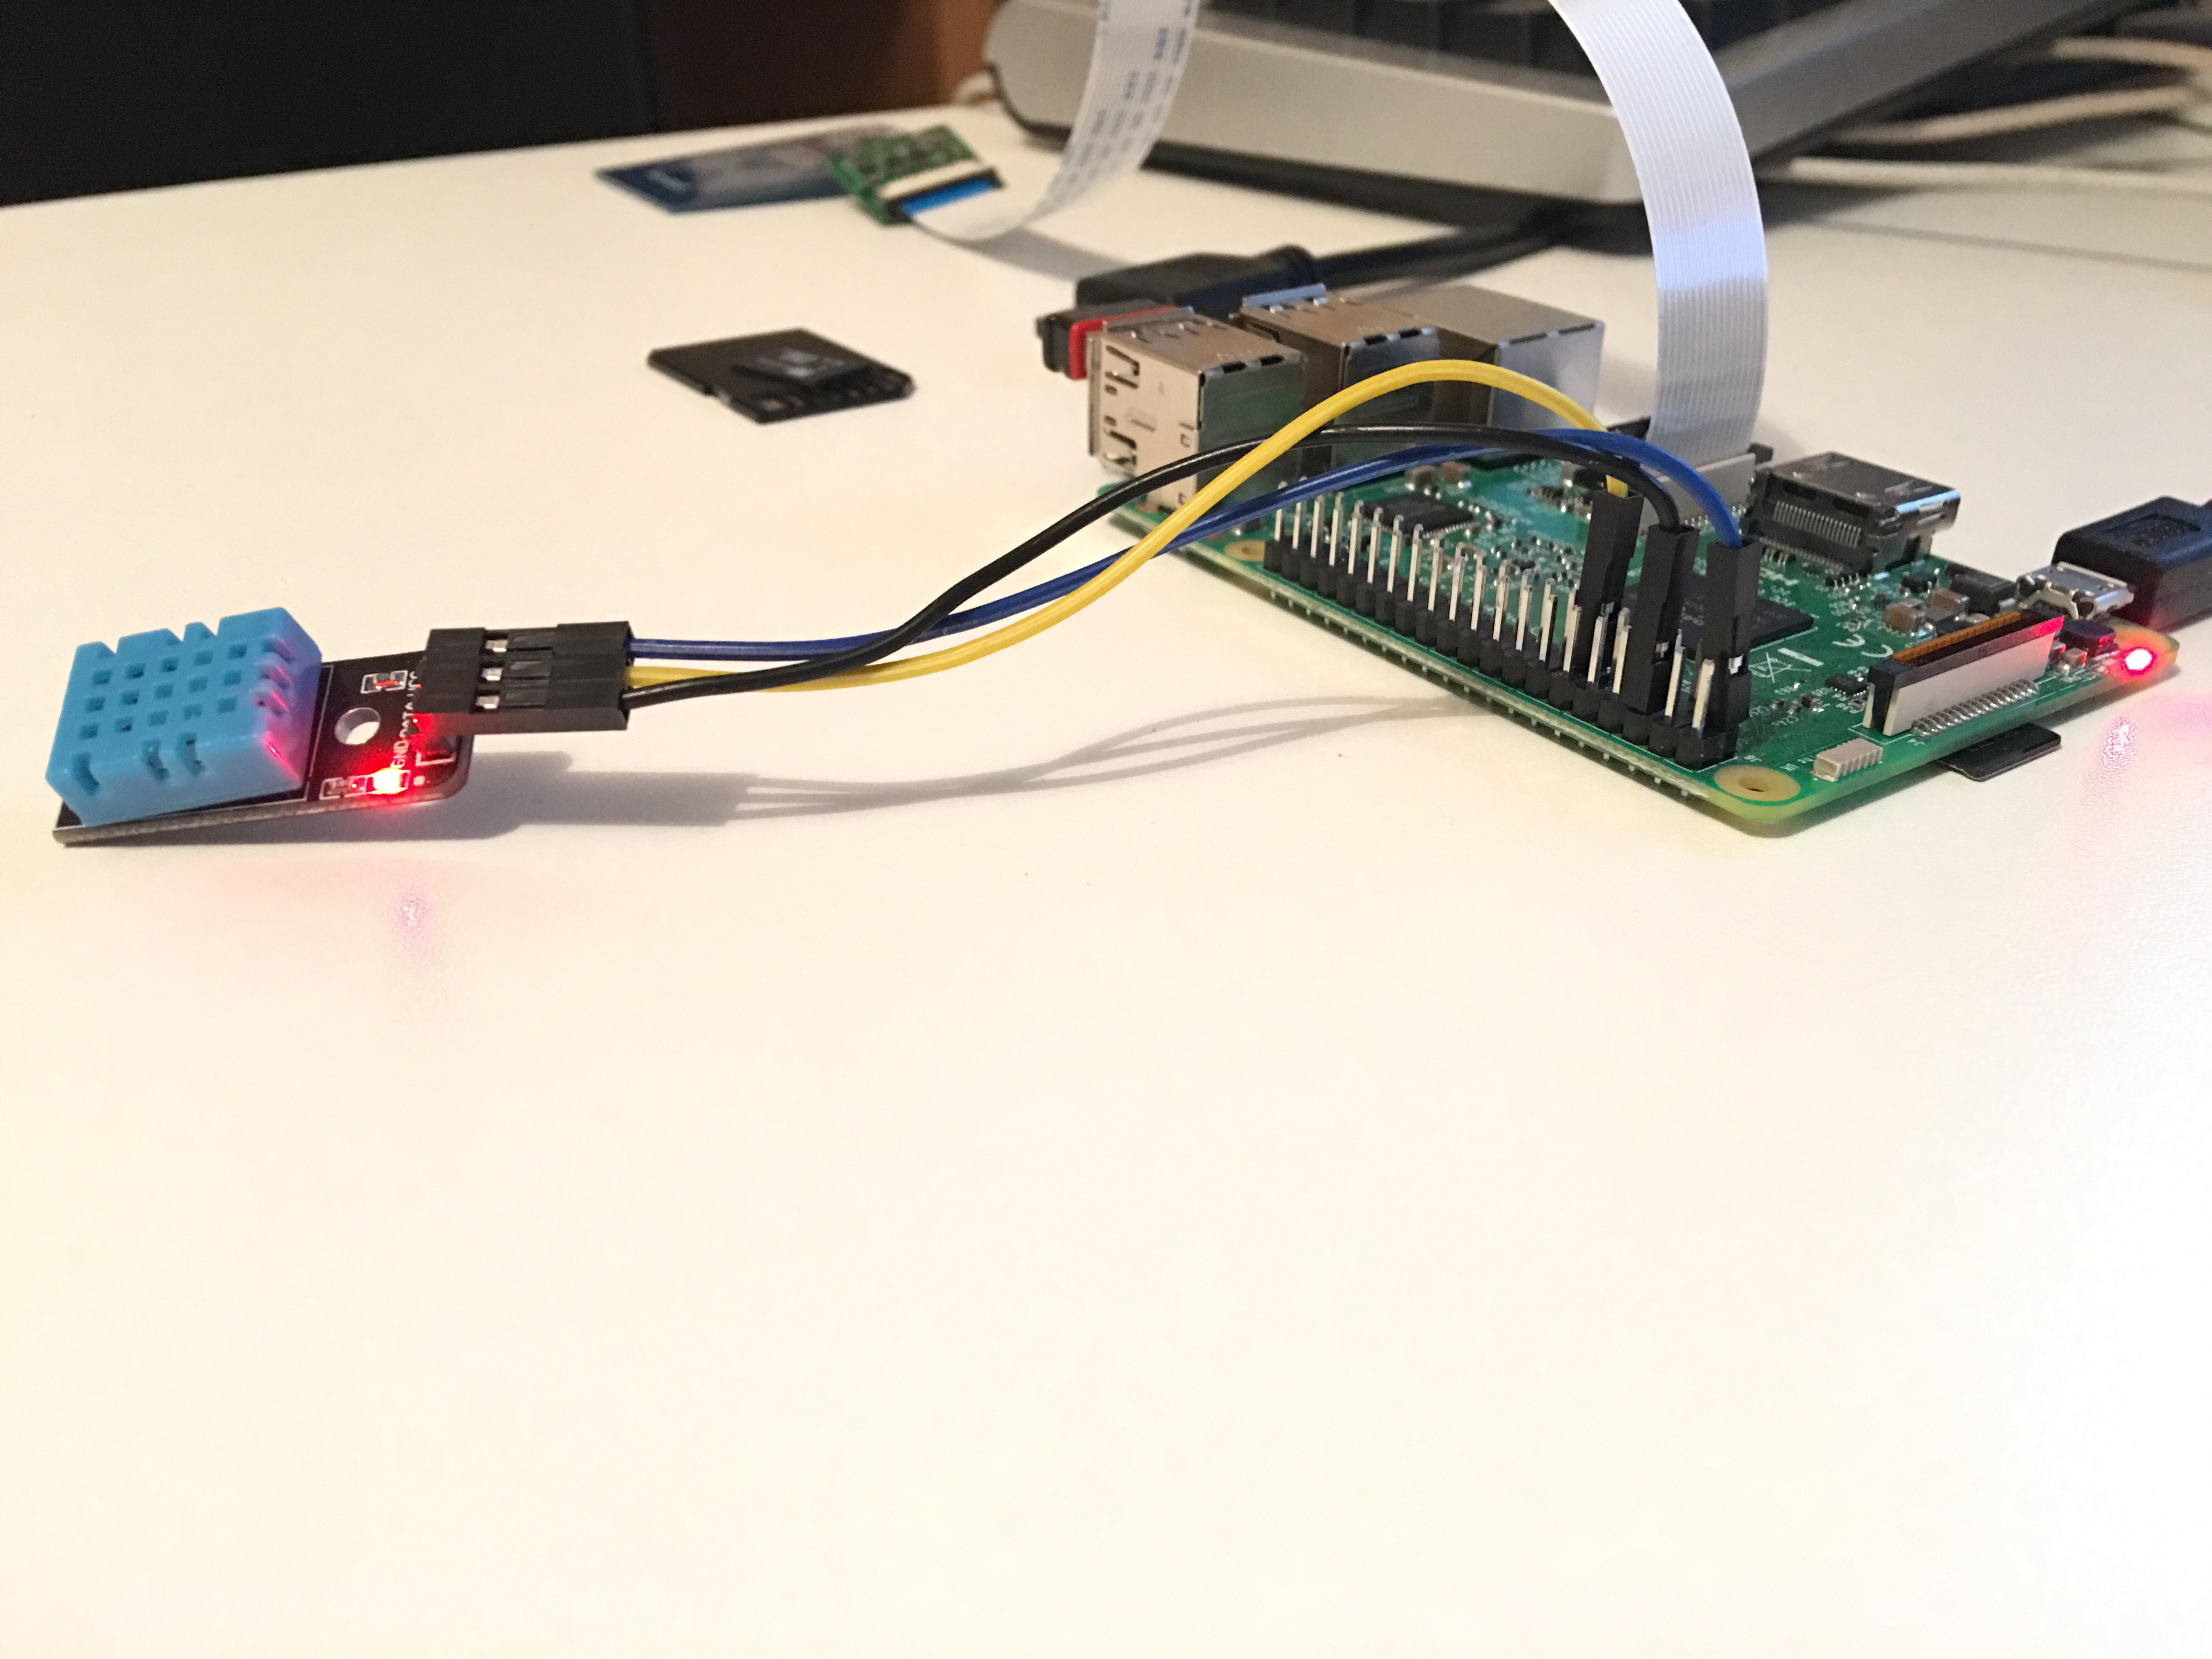
I have included a picture of the whole setup.

After you complete the setup, turn on your raspberry pi. you will see a red led light on your sensor, which means it is powered on.

Reading From DHT11
To make the tutorial very simple, let’s just get some reading from our sensor.
We will use the following python library to do this DHT11_python
I assume you have already, sshed to your raspberry pi, you can refer to this link
Then execute the command below
pi@raspberrypi:~ $ cd ~
pi@raspberrypi:~ $ git clone https://github.com/szazo/DHT11_Python.git
pi@raspberrypi:~ $ cd DHT11_Python
pi@raspberrypi:~ $ nano dht11_example.py
Change the number of the pin from 14 to 17
instance = dht11.DHT11(pin=17)
Then save the python script (CTRL+X), and lunch the python script, by running
python dht11_example.pyThat’s all for now. as I said it s very simple and straight forward. Soon we can go deeper than this, and do more awesome things with this sensor.

Comments