SSH is very secure protocol to access and administrate remotely your servers. as result the ssh daemon must exposed to internet. Any service exposed to internet it’s unfortunately exposed also to security threats.
Brute force attacks can be run against your machine trough ssh. in Ubuntu /var/log/auth.log will record any login attempt to the server.
In case you found the alerts below,then it’s time to take some actions.
error: maximum authentication attempts exceeded for root fromDisconnecting: Too many authentication failures for root [preauth]reverse mapping checking getaddrinfo for failed - POSSIBLE BREAK-IN ATTEMPT!
What I m trying to do
Block unauthorized SSH login using Fail2Ban.
Enviroment
- EC2 machine running Ubuntu 14.04
Prerequisite
- Fail2Ban .
Basic Steps
- Install Fail2Ban
- Configure Fail2Ban
- Test it
1. Install Fail2Ban
- it’s very easy to install Fail2Ban on Ubuntu, since the Ubuntu packaging system maintains a fail2ban package in the default repository.
- first I need to update my local package index, then I will use apt to download and install Fail2Ban.
sudo apt-get update
sudo apt-get install fail2ban
2. Configure Fail2Ban
- After installing fail2ban navigate to the following directory
/etc/fail2ban/. - All we need is to configure jail.conf, which is the default configuration.
-
The default configuration will do fine, but there are few settings that you may want to change. to make the service more robust.
ignoreip: configure the ip @ that fail2ban must ignore. by default it’s configured to not ban any traffic coming from localhost. if you have a public ip you may want to add it. just append your public ip @ next to 127.0.0.1/8 after space separator.
[DEFAULT]
....
ignoreip = 127.0.0.1/8 192.168.0.1bantime: by the default the ban time is set to 600 seconds (10 mins), it’s better to increase this value to one hour or two but not more than that. Because usually hackers they give up after half hour of attempts maximum one hour. And in case you were locked (forgot your password or username), you don’t want to be blocked for more than an hour.
[DEFAULT]
....
bantime = 127.0.0.1/8 192.168.0.1findtimeandmaxretry: you want to pay extar attention to this two parameters, because these two values what determines which client is found to be an illegitimate user that should be banned. so any client that exceed 3 attempts within 5 minute will be banned. the default value is 10 min (I find 10 min too generous), so it s better to change it to 5 min or less.
[DEFAULT]
....
findtime = 300
maxretry = 3action: it is self explanatory, this tells what actions fail2ban should take in case of a ban (matching the parameters we set above). there are 3 main actions :- action_ : preforms a ban/block by adding the balcklisted IP @ to the IP tables.
- action_mw : ban the IP @ and send an e-mail with whois report.
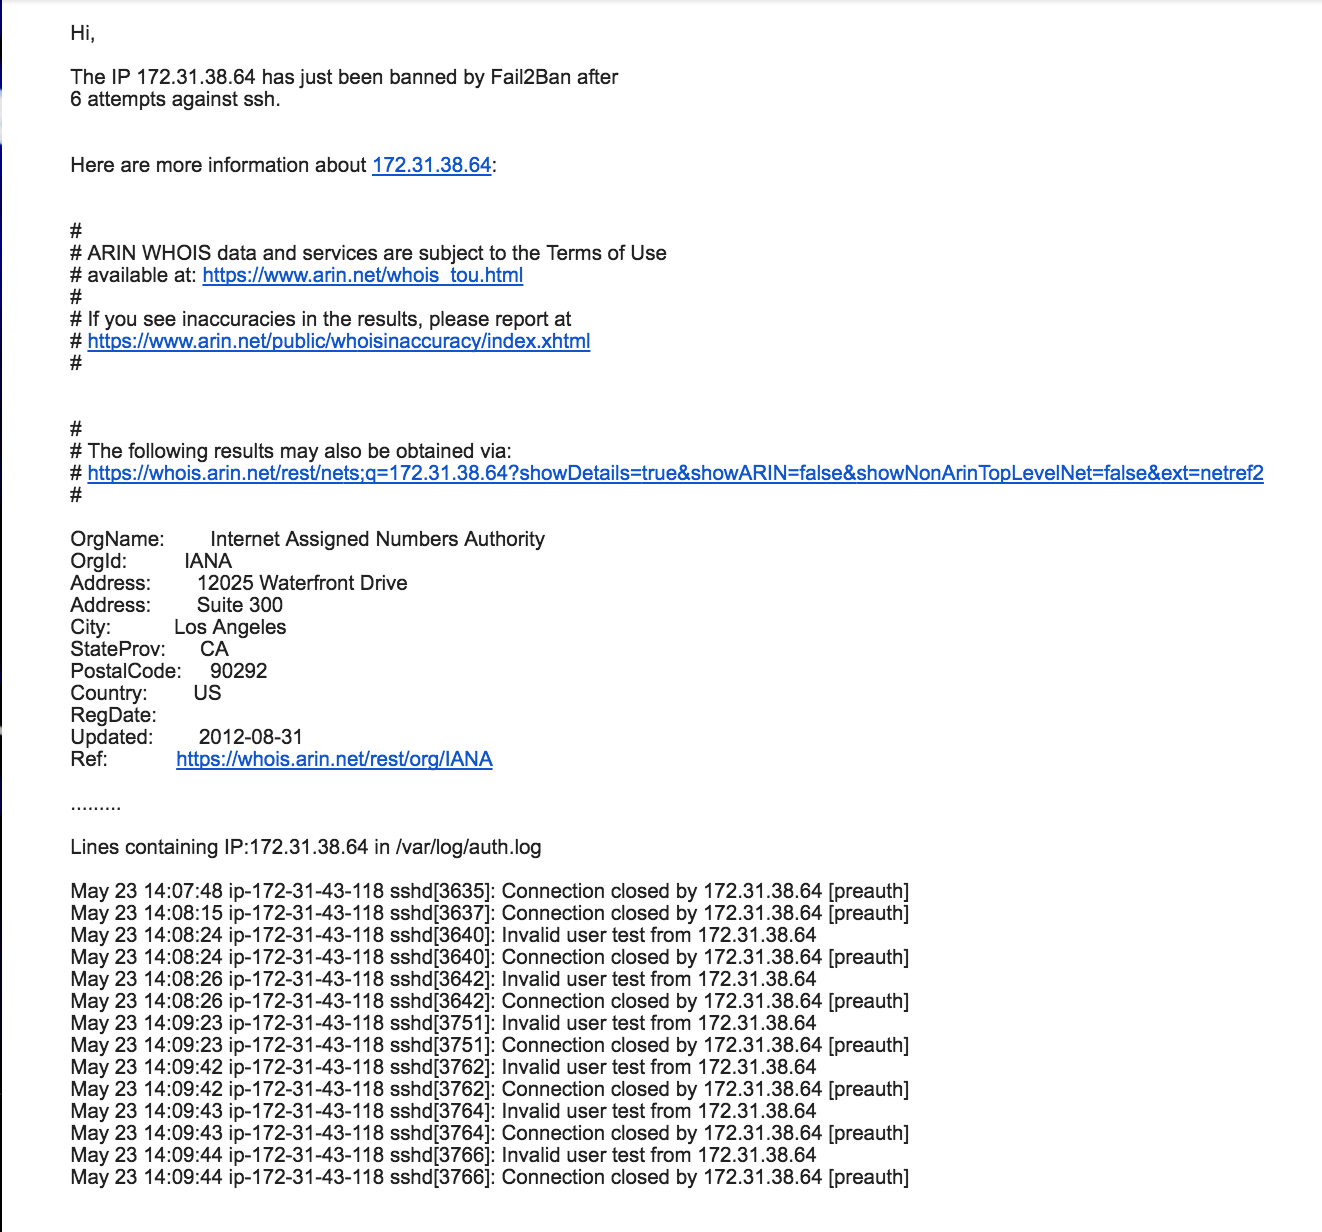
- action_mwl : ban the IP @ and send an e-mail with whois report and relevant log lines.
- Personally I prefer action_mwl . it’s up to you to choose which configuration, action 2 and 3 requires mail service installed and configured on your machine.
[DEFAULT]
....
action = %(action_mwl)s- Since I configured fail2ban to send emails alerts and reports, you need to do some extra configuration. always in the same file
/etc/fail2ban/jail.confI will configure the mail service and change the email sender & receiver. FWI : I have sendmail installed and configured on my machine, you need to do the same.I m not going to explain it in this post maybe in another post.
[DEFAULT]
....
destemail = admin@issamben.com
....
sendername = Machine Name - SSH BAN
....
mta = sendmail- Last thing make sure that the ssh ban is enabled . there are other services you can watch and protect using fail2ban such as http, apache, php ftp …etc. all you have to do is enabled the ban on the service.
[ssh]

enabled  = true
port     = ssh
filter   = sshd
logpath  = /var/log/auth.log
maxretry = 3
3. Test Fail2Ban
- Now save the configuration changes you made on
/etc/fail2ban/jail.conf. and reload the service to use the new configuration
sudo service fail2ban reload- if you setup the email service correctly you will get a notification letting you know that your service is running.
Hi, The jail ssh has been started successfully. Regards, Fail2Ban
- To test Fail2ban just ssh to your machine number of times until you exceed the limit you set in the configuration.
- you can watch
/var/log/fail2ban.logto see what’s happening - In case a ban is executed you will be notified in case you set email alerts in the action configuration.
Example:


Comments